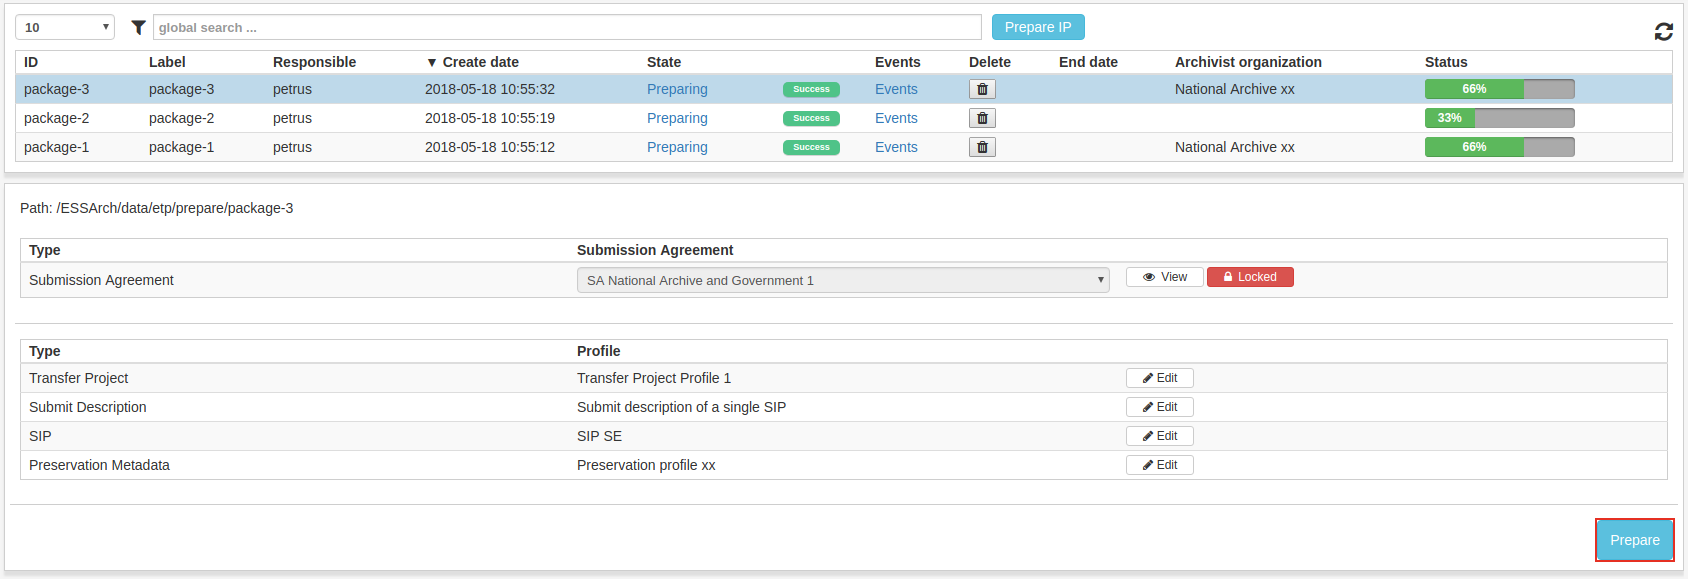
Prepare IP
The first step in the process of SIP creation is Prepare IP, IPs That are not yet Prepared are listed in the Prepare IP list view.
Prepare
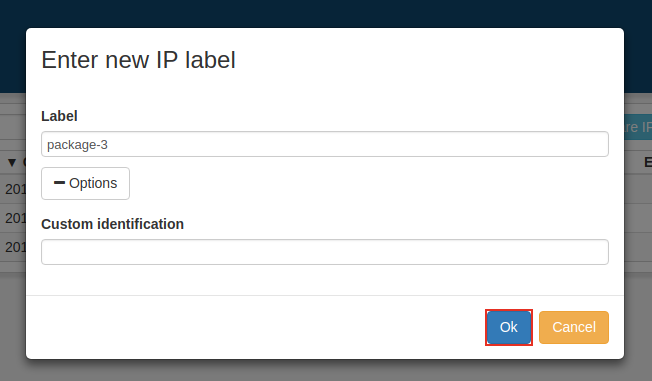
The prepare process is started by clicking the Prepare IP button.

The user is then asked to type a label for the new IP and can optionally enter a custom identifier value.
Profile editor
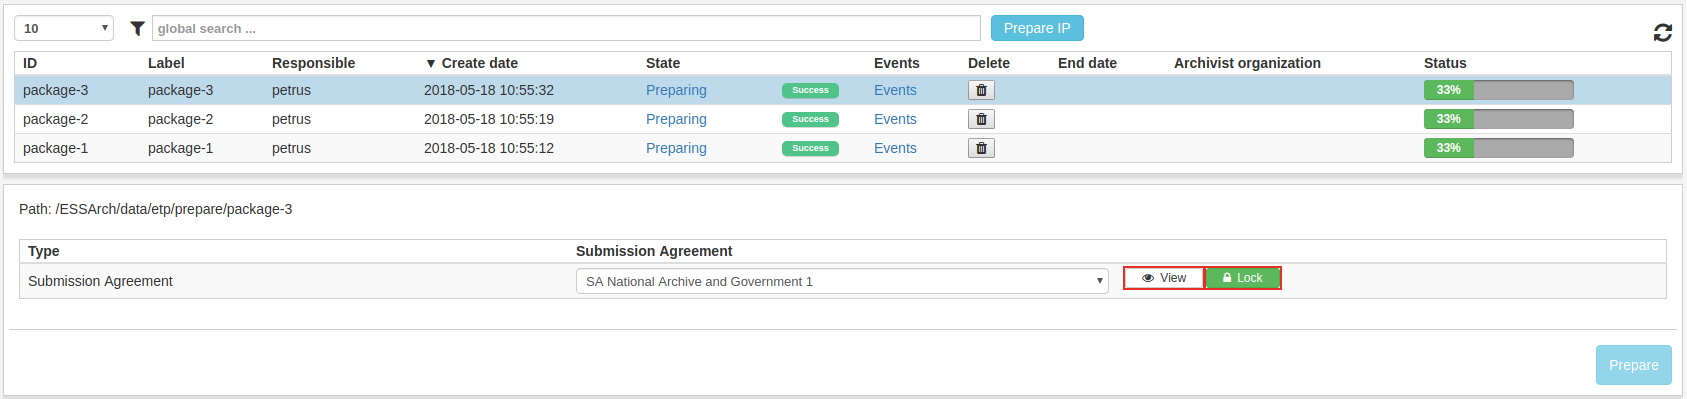
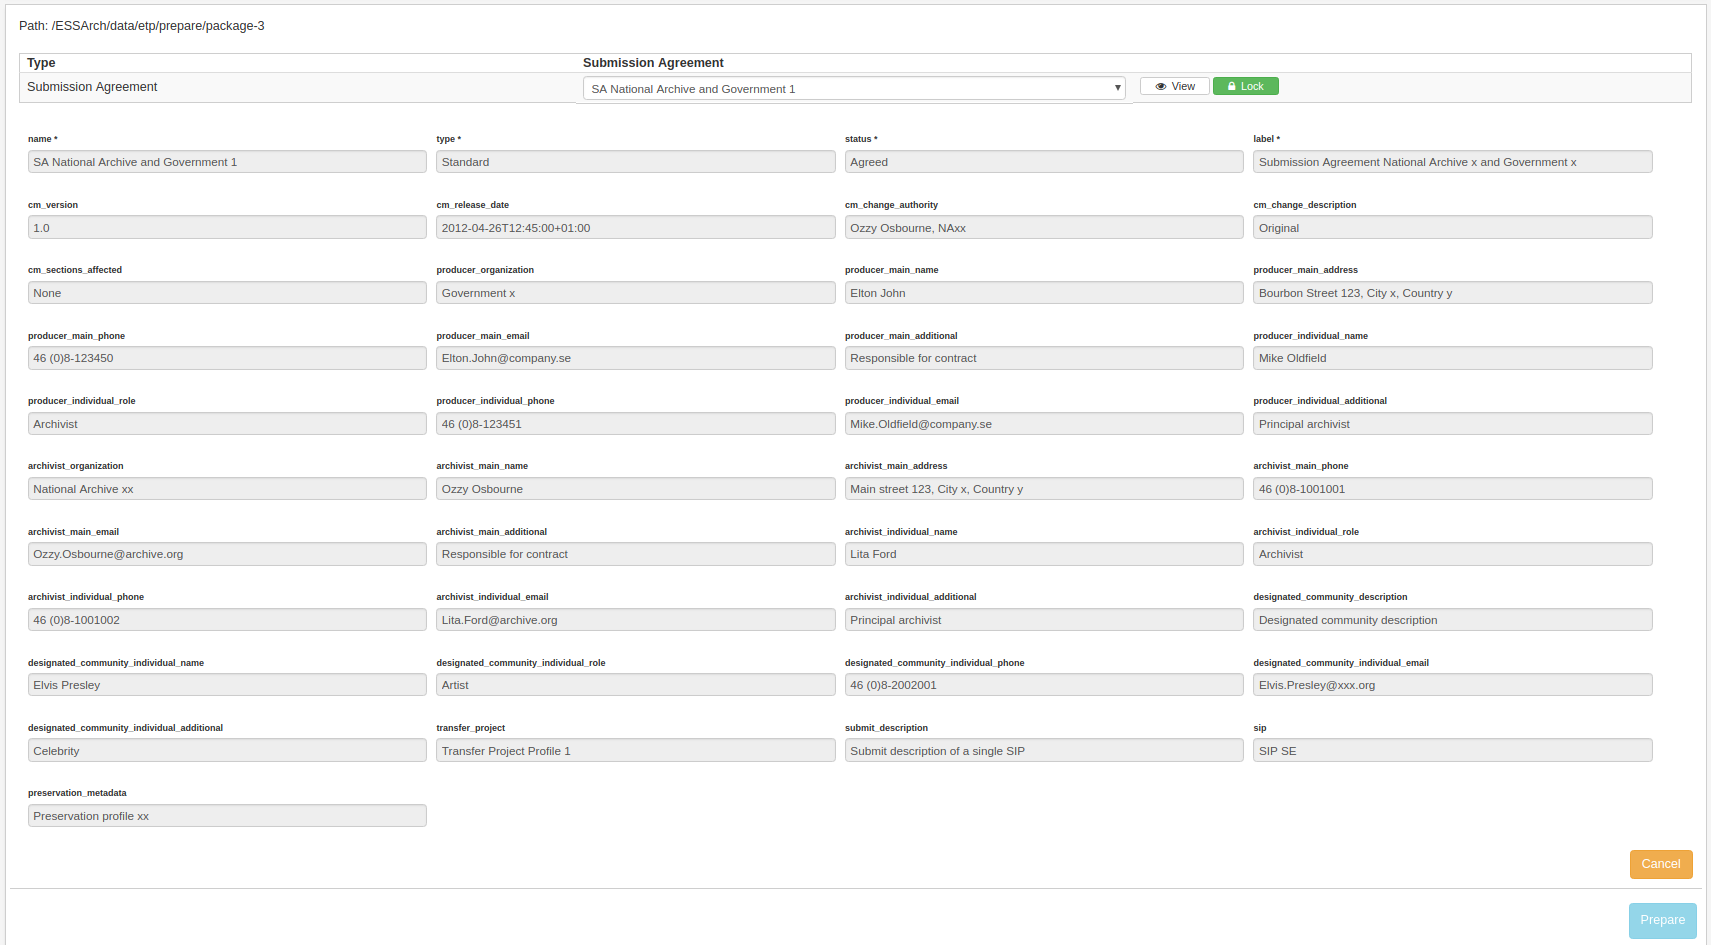
When clicking the IP row in the list view, the user can chose which Submission Agreement(SA)-profile to use. The Submission Agreement fields can be viewed by clicking the View button next to the SA-select. When the user is satisfied, he/she locks it by clicking the lock button.
After Submission agreement is locked, the profiles can be viewed and edited.
The user can edit profiles by clicking the Edit button in the profile table which will allow the user to edit the data of the profile fields for that specific profile. When done, click save and a new version of the profile data will be saved and made the current version.

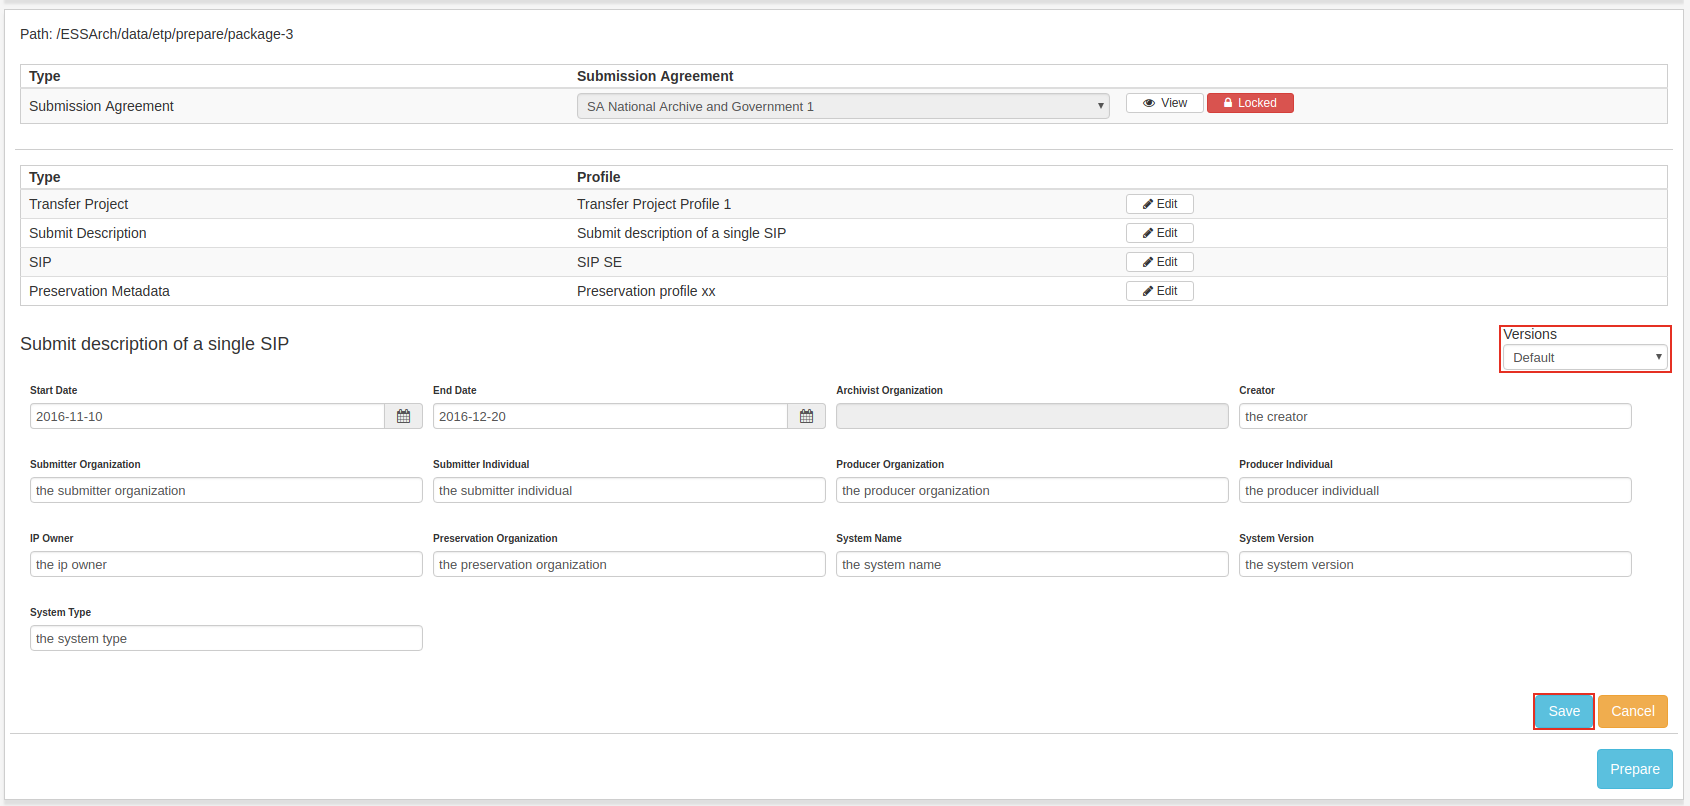
The user can use the Versions-dropdown list to choose earlier or later versions of the profile data.
If the user is satisfied with all profiles, the IP can be prepared by clicking the Prepare-button in the bottom right corner.
When IP is Prepared it is no longer visible in the Prepare IP list view and can be found in the Collect content list view.